How to Curve Text in Canva
Want to elevate your Canva designs? Here is a quick guide on how to curve text in Canva so you can make beautiful business logos, Pinterest graphics, Instagram carousels, and more!
Curved text can be a great addition to your designs in Canva. Whether you’re looking to add a creative touch to headers or highlight specific sections of your design, curved text is the perfect way to do so.
This post may contain affiliate links, which means I get a small commission if you purchase a product. I recommend products that I personally use and enjoy. Thank you!
Canva has added new effects that make it easy and quick to curve text, reducing time.
This tutorial demonstrates how to curve text in Canva easily, and the steps apply to all Canva users, including those using the pro, free, and app versions.
Follow this guide for step-by-step instructions on how to curve text in Canva:
How to Curve Text in Canva: Step-by-Step Tutorial
Nowadays, you don’t need to manually curve each letter to give your text a stylish look. With the Canva curved text generator, adding curved text to your Google Slides presentation is simpler and possibly more accessible than using Adobe Photoshop.
Related: Is Canva Pro Worth It? Canva Free vs. Paid
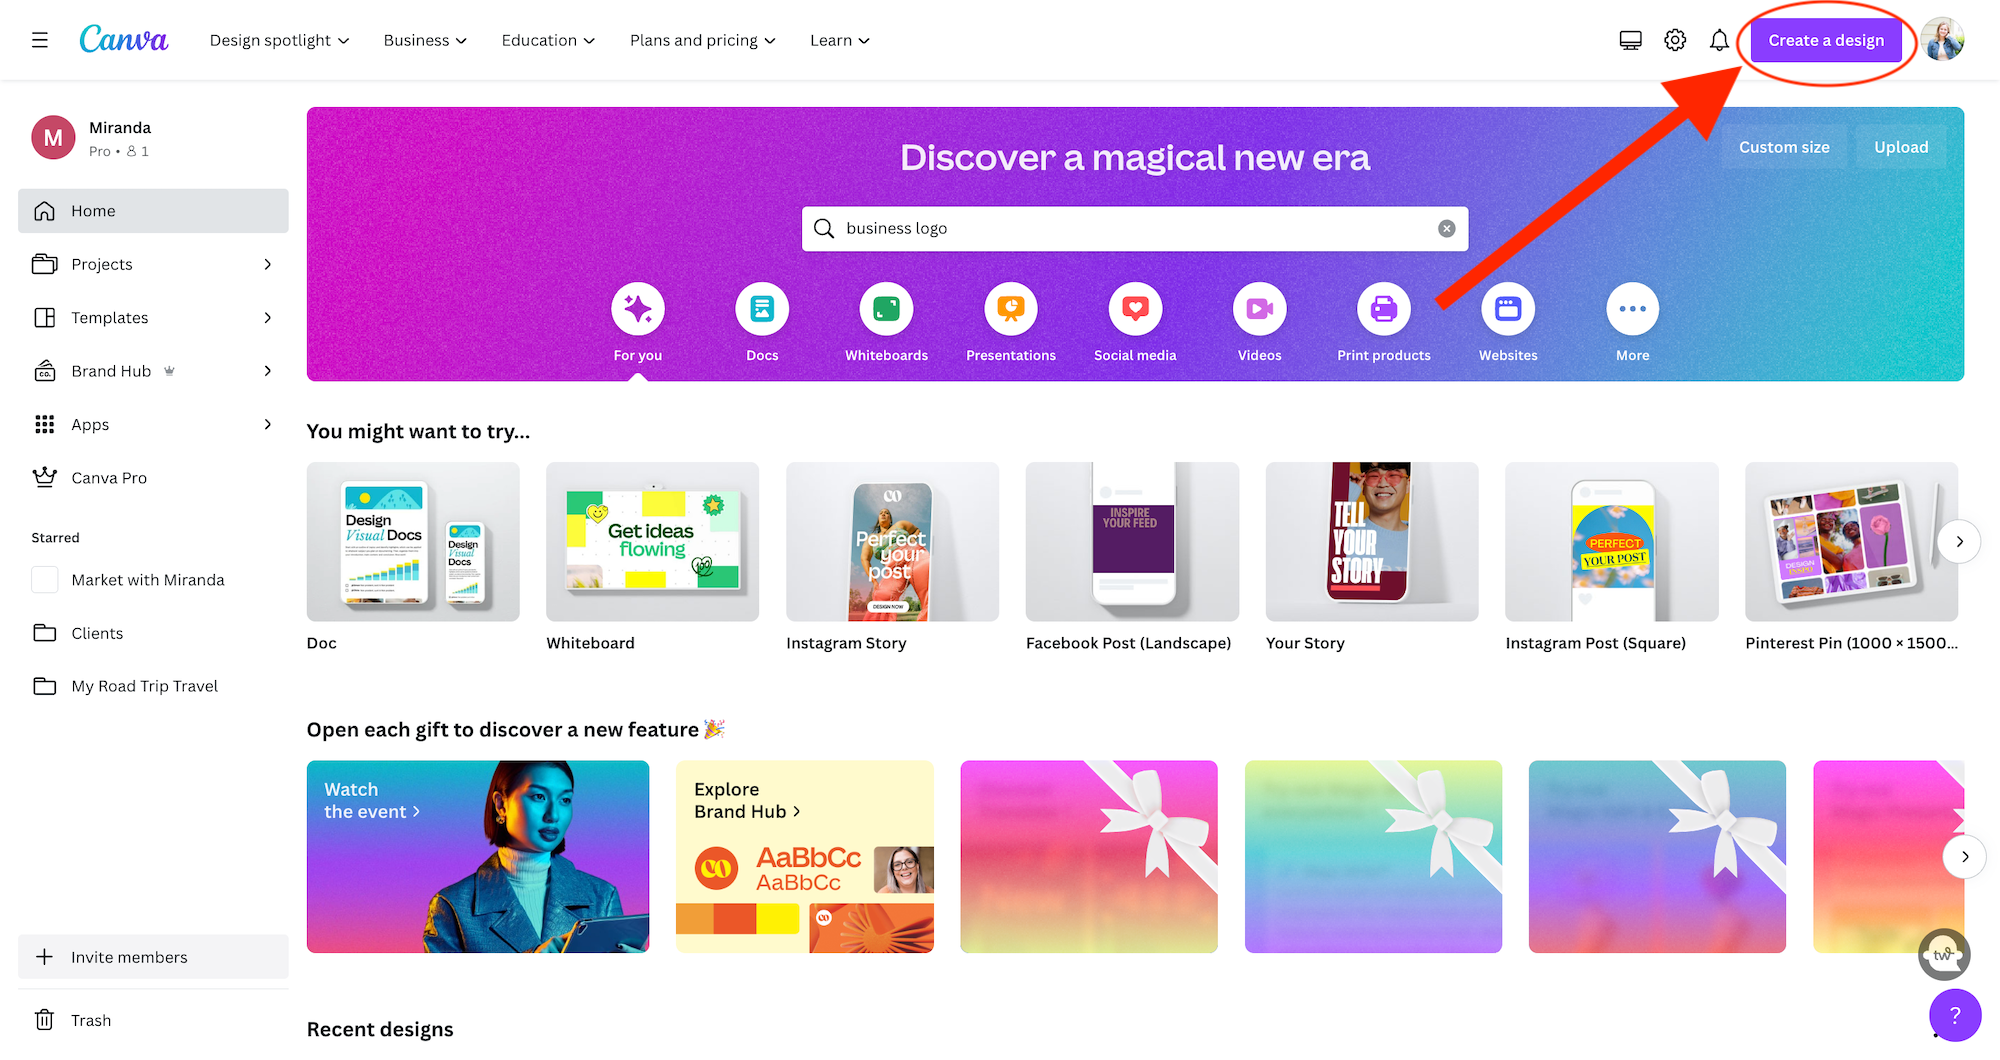
1. Create a New Design in Canva
For the first step, go to the Canva homepage and select either “Create a Design” or “Create a Presentation” on the top-right corner, depending on what type of project you’re working on.
Choose the size in which you want your slides to be displayed.
For this example, I selected an Instagram post (1,080 pixels by 1,080 pixels).
Related: 23 Inspiring Canva Fonts That Go Together
2. Add a Text Box with Your Preferred Text
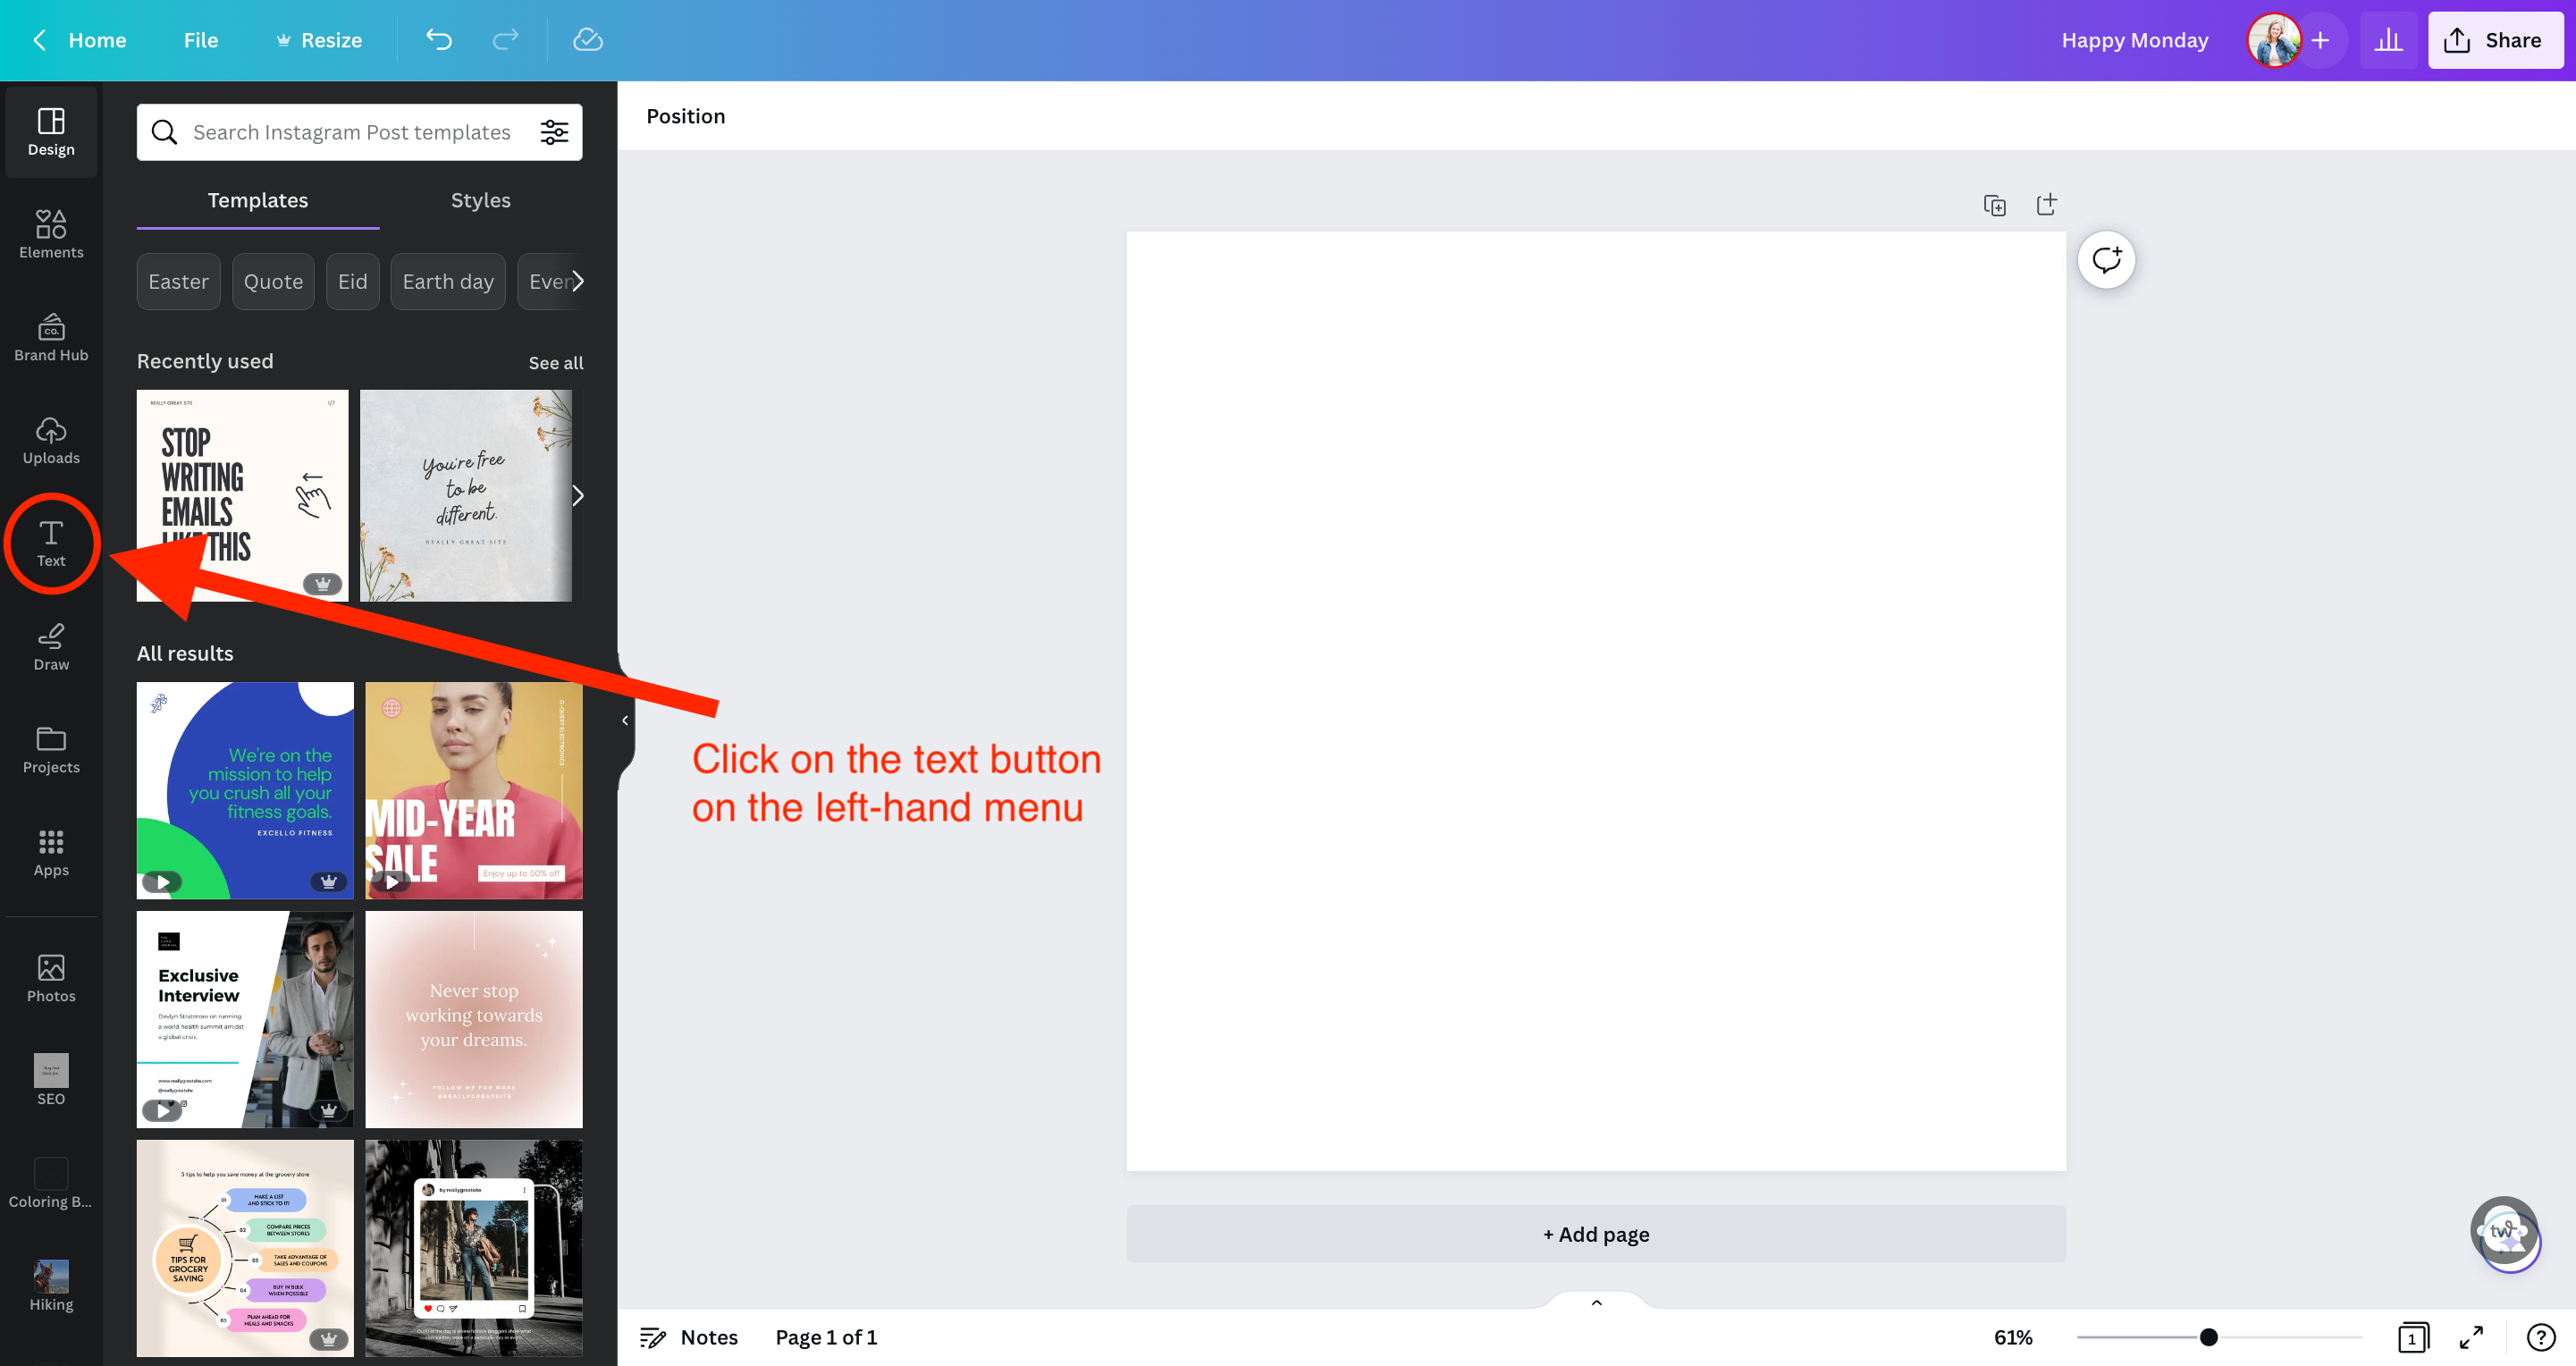
To add a text box, follow these steps:
Select the “Text” option from the left menu.
Click on the “Add a text box” button from the expanded options.
Related: 20 Best Canva Fonts for Instagram
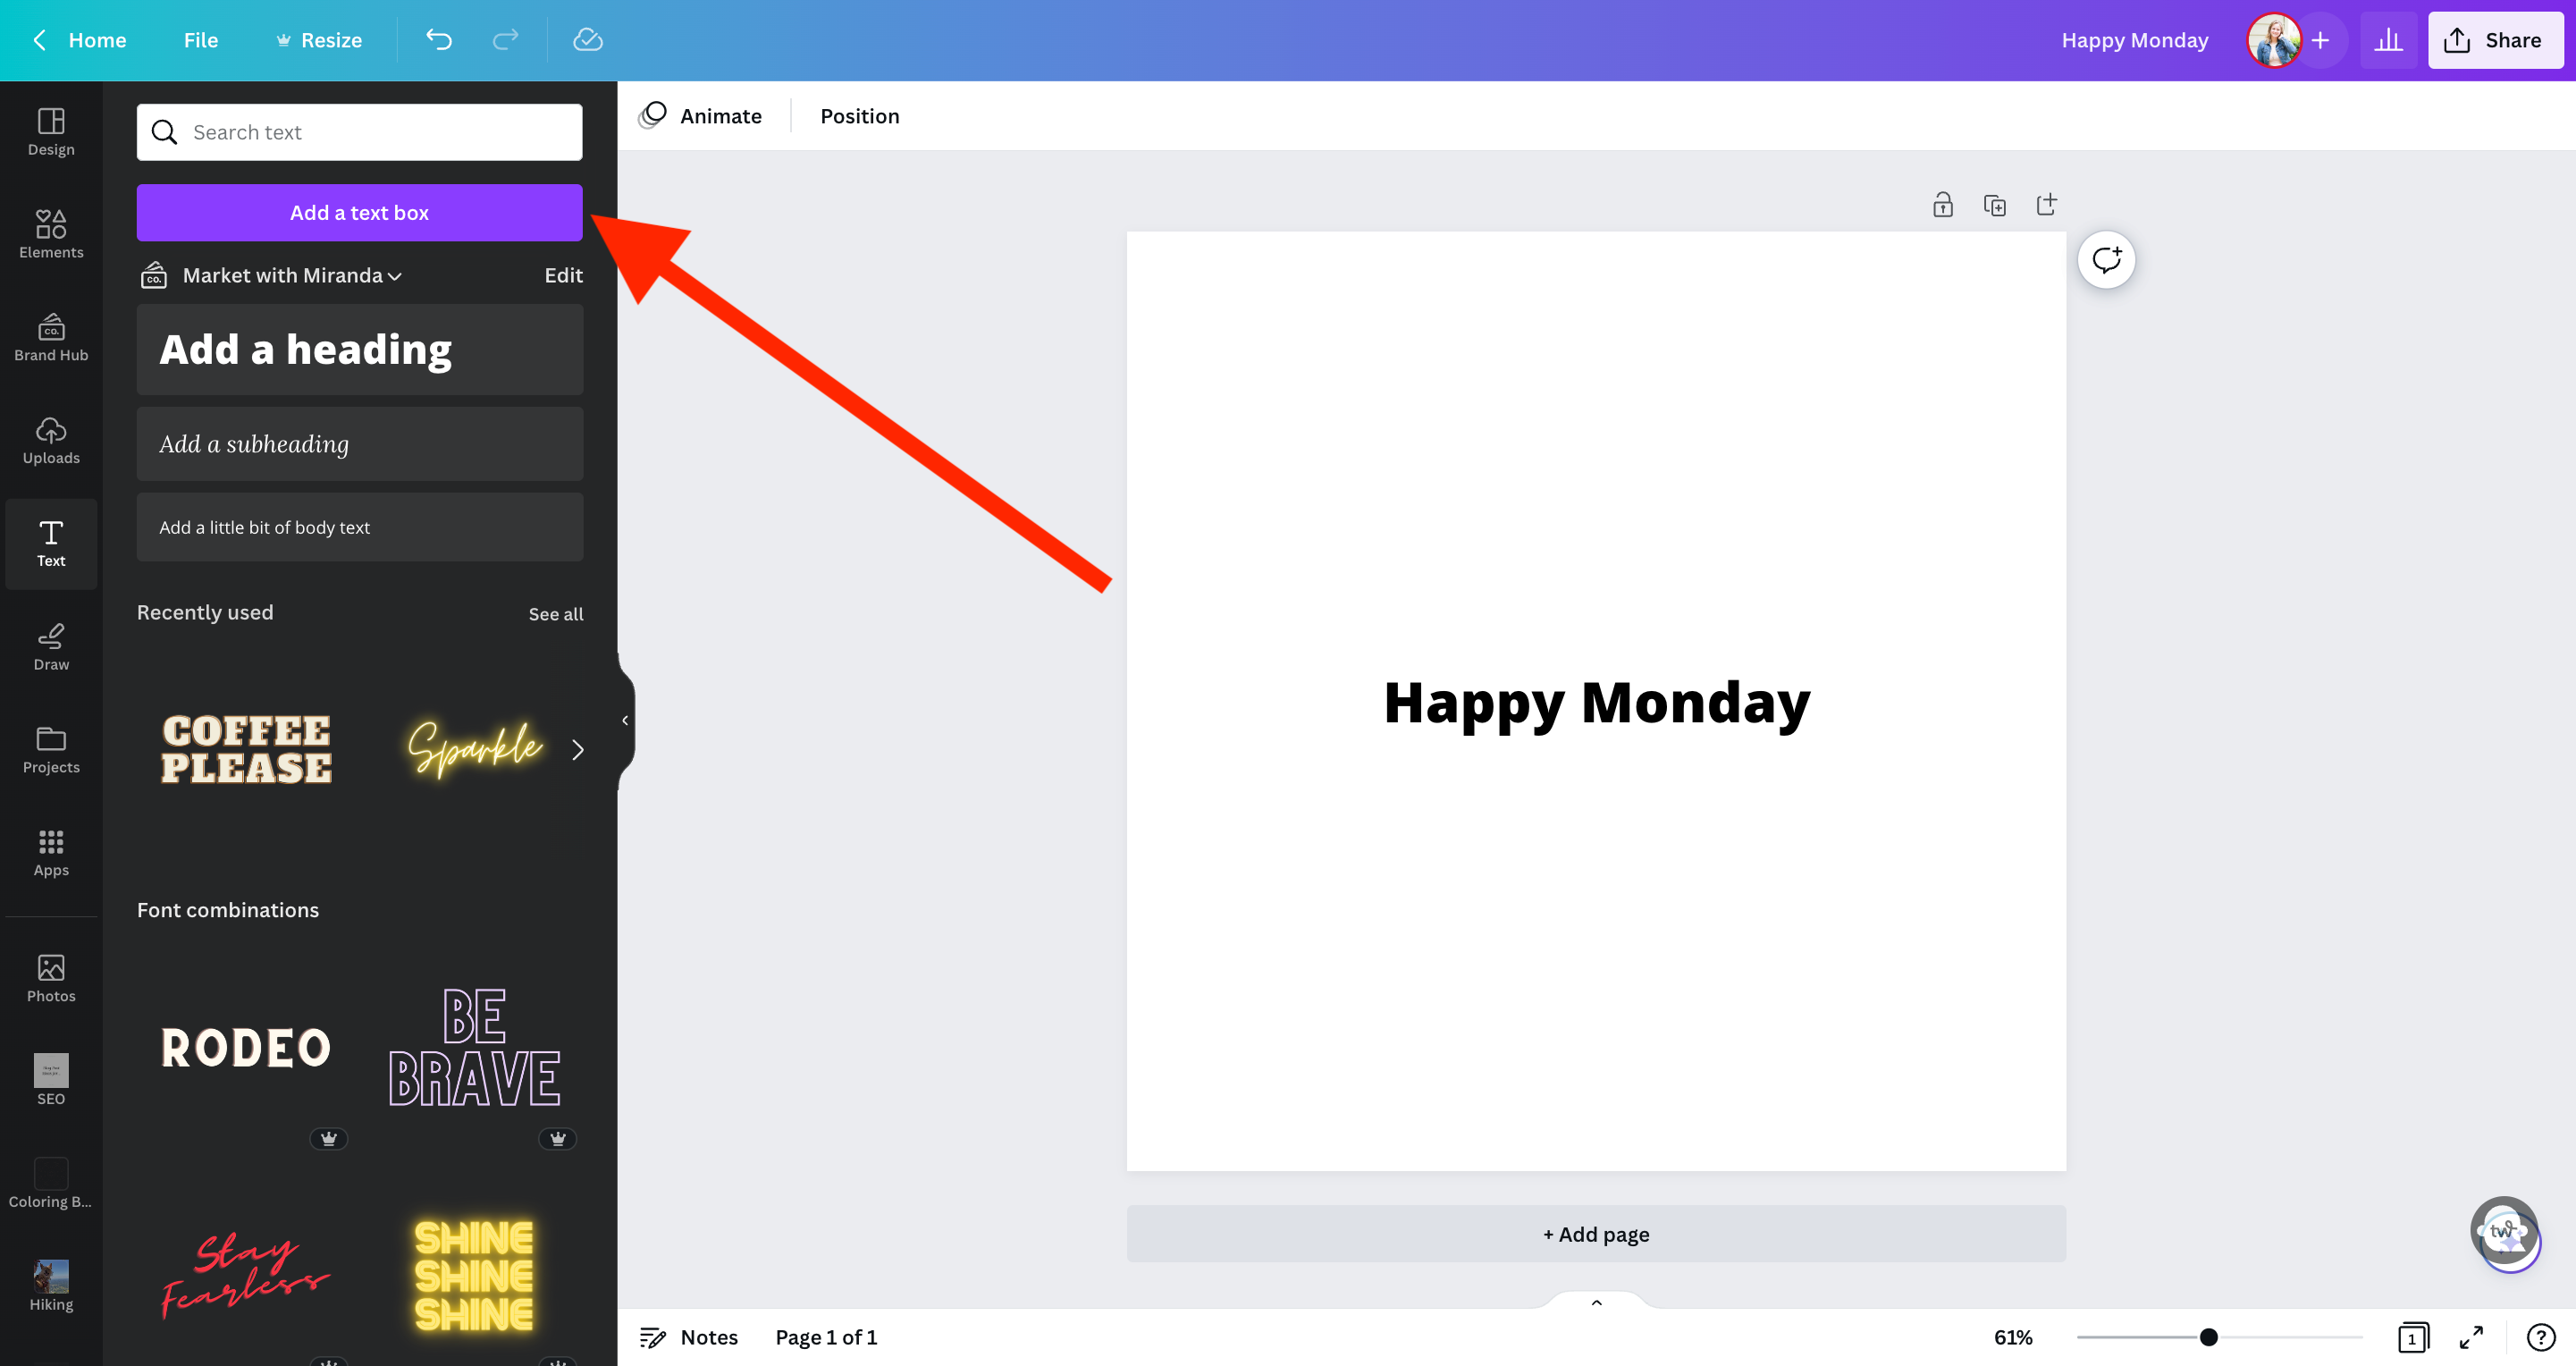
For formatting, you can choose from various templates such as headings, subheadings, and body text.
After adding the text box to your canvas, input the text you want to curve.
Once you click on your text in your design, you can change the font, font size, whether it’s bold or italisized.
3. Apply the Curved Text Effect
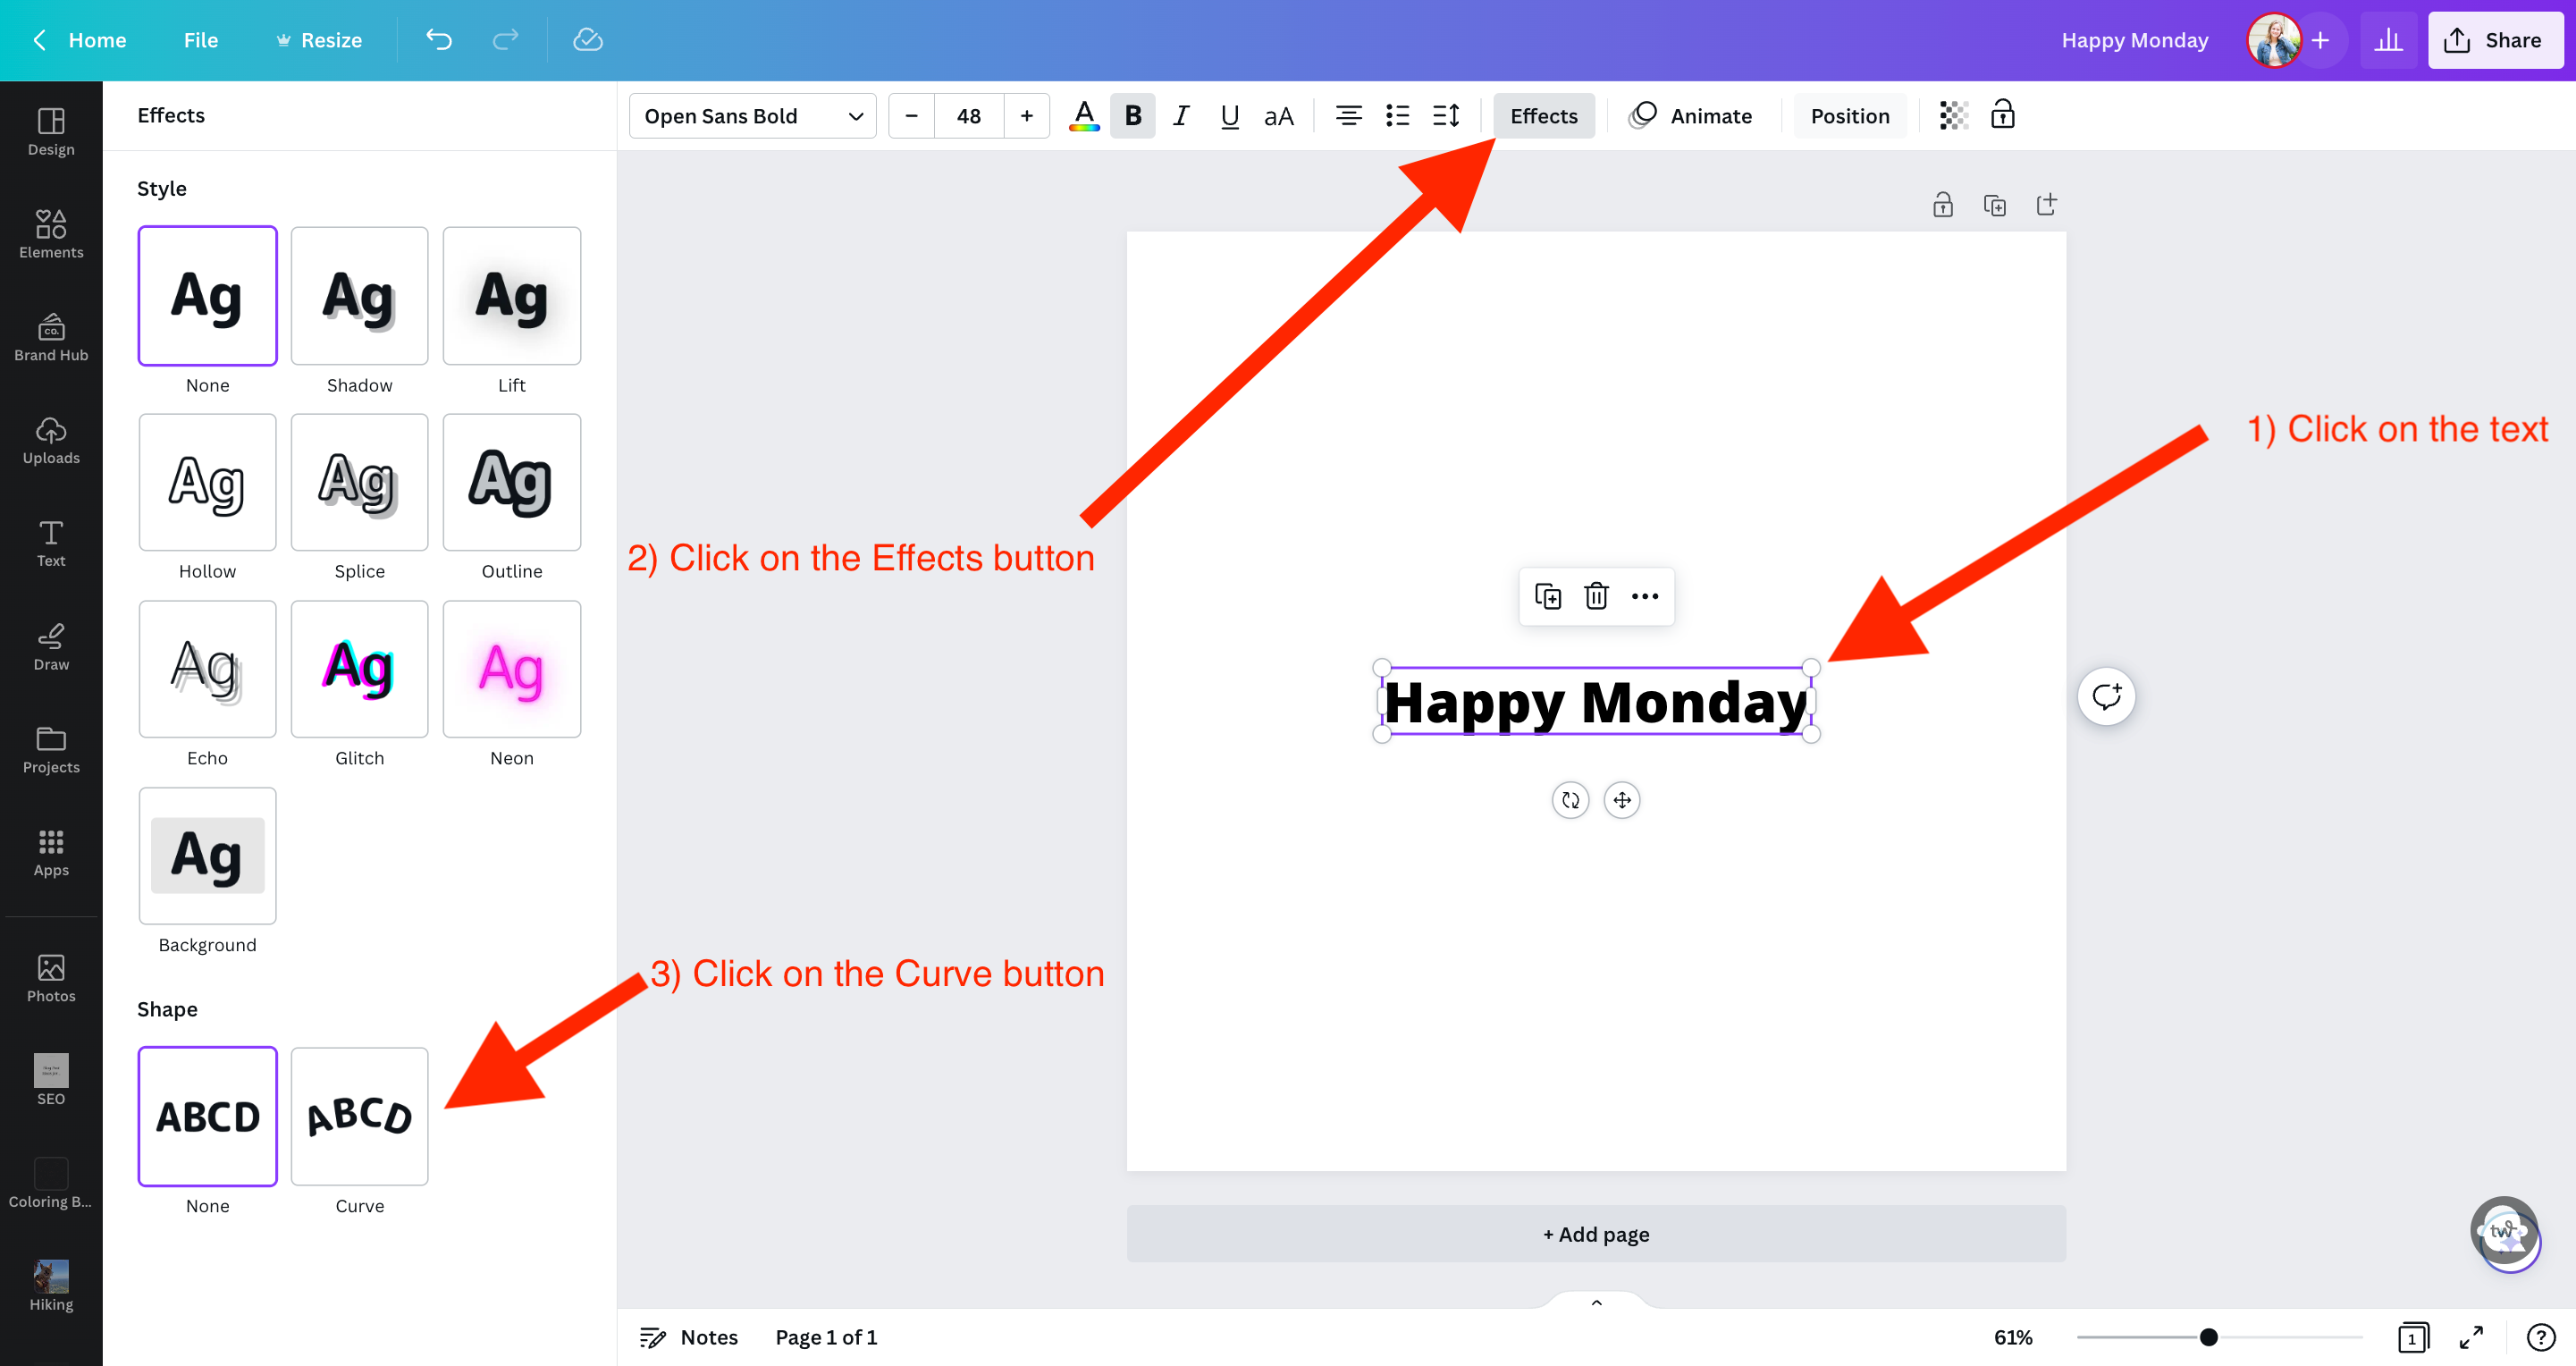
If the text box on your canvas is not already selected, please select it. Then, locate and click on the “Effects” tab located above.
To create curved text, find the “Curve” shape in the expanded menu on the left and click on it.
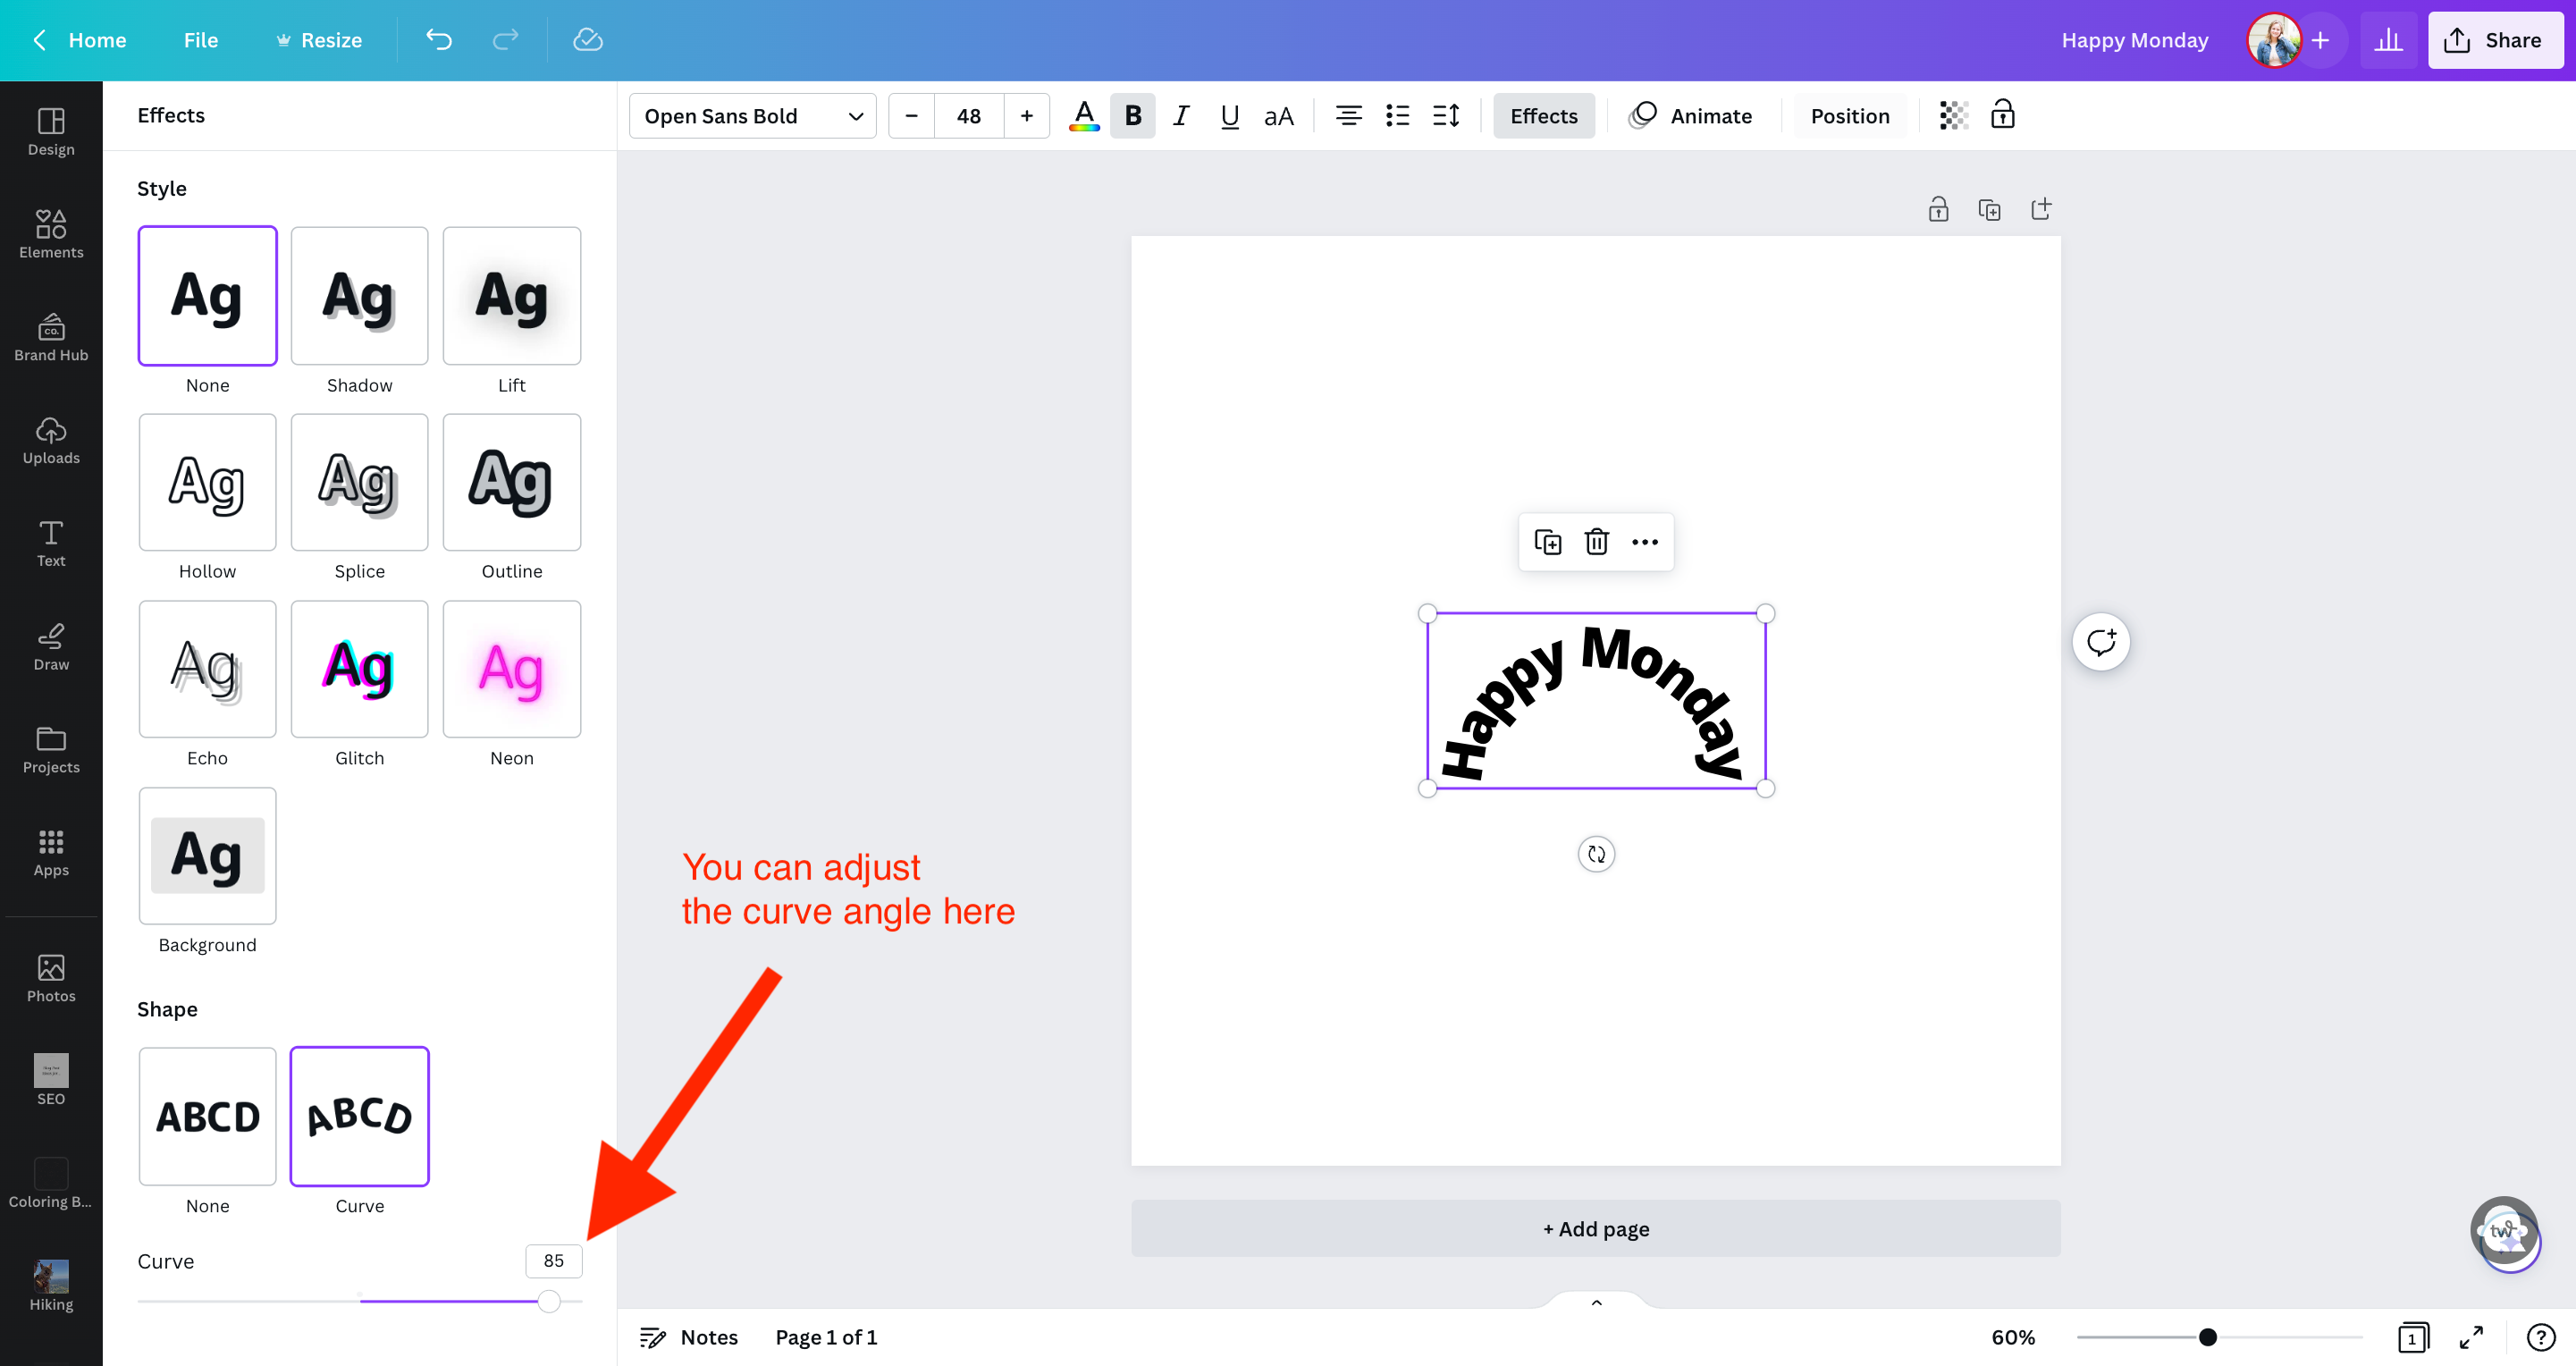
From there, you can adjust the curve text feature by adjusting the toggle near the bottom left of your screen.
The higher the number, the more curved the text will be.
Related: 125 Best Canva Keywords for Elements
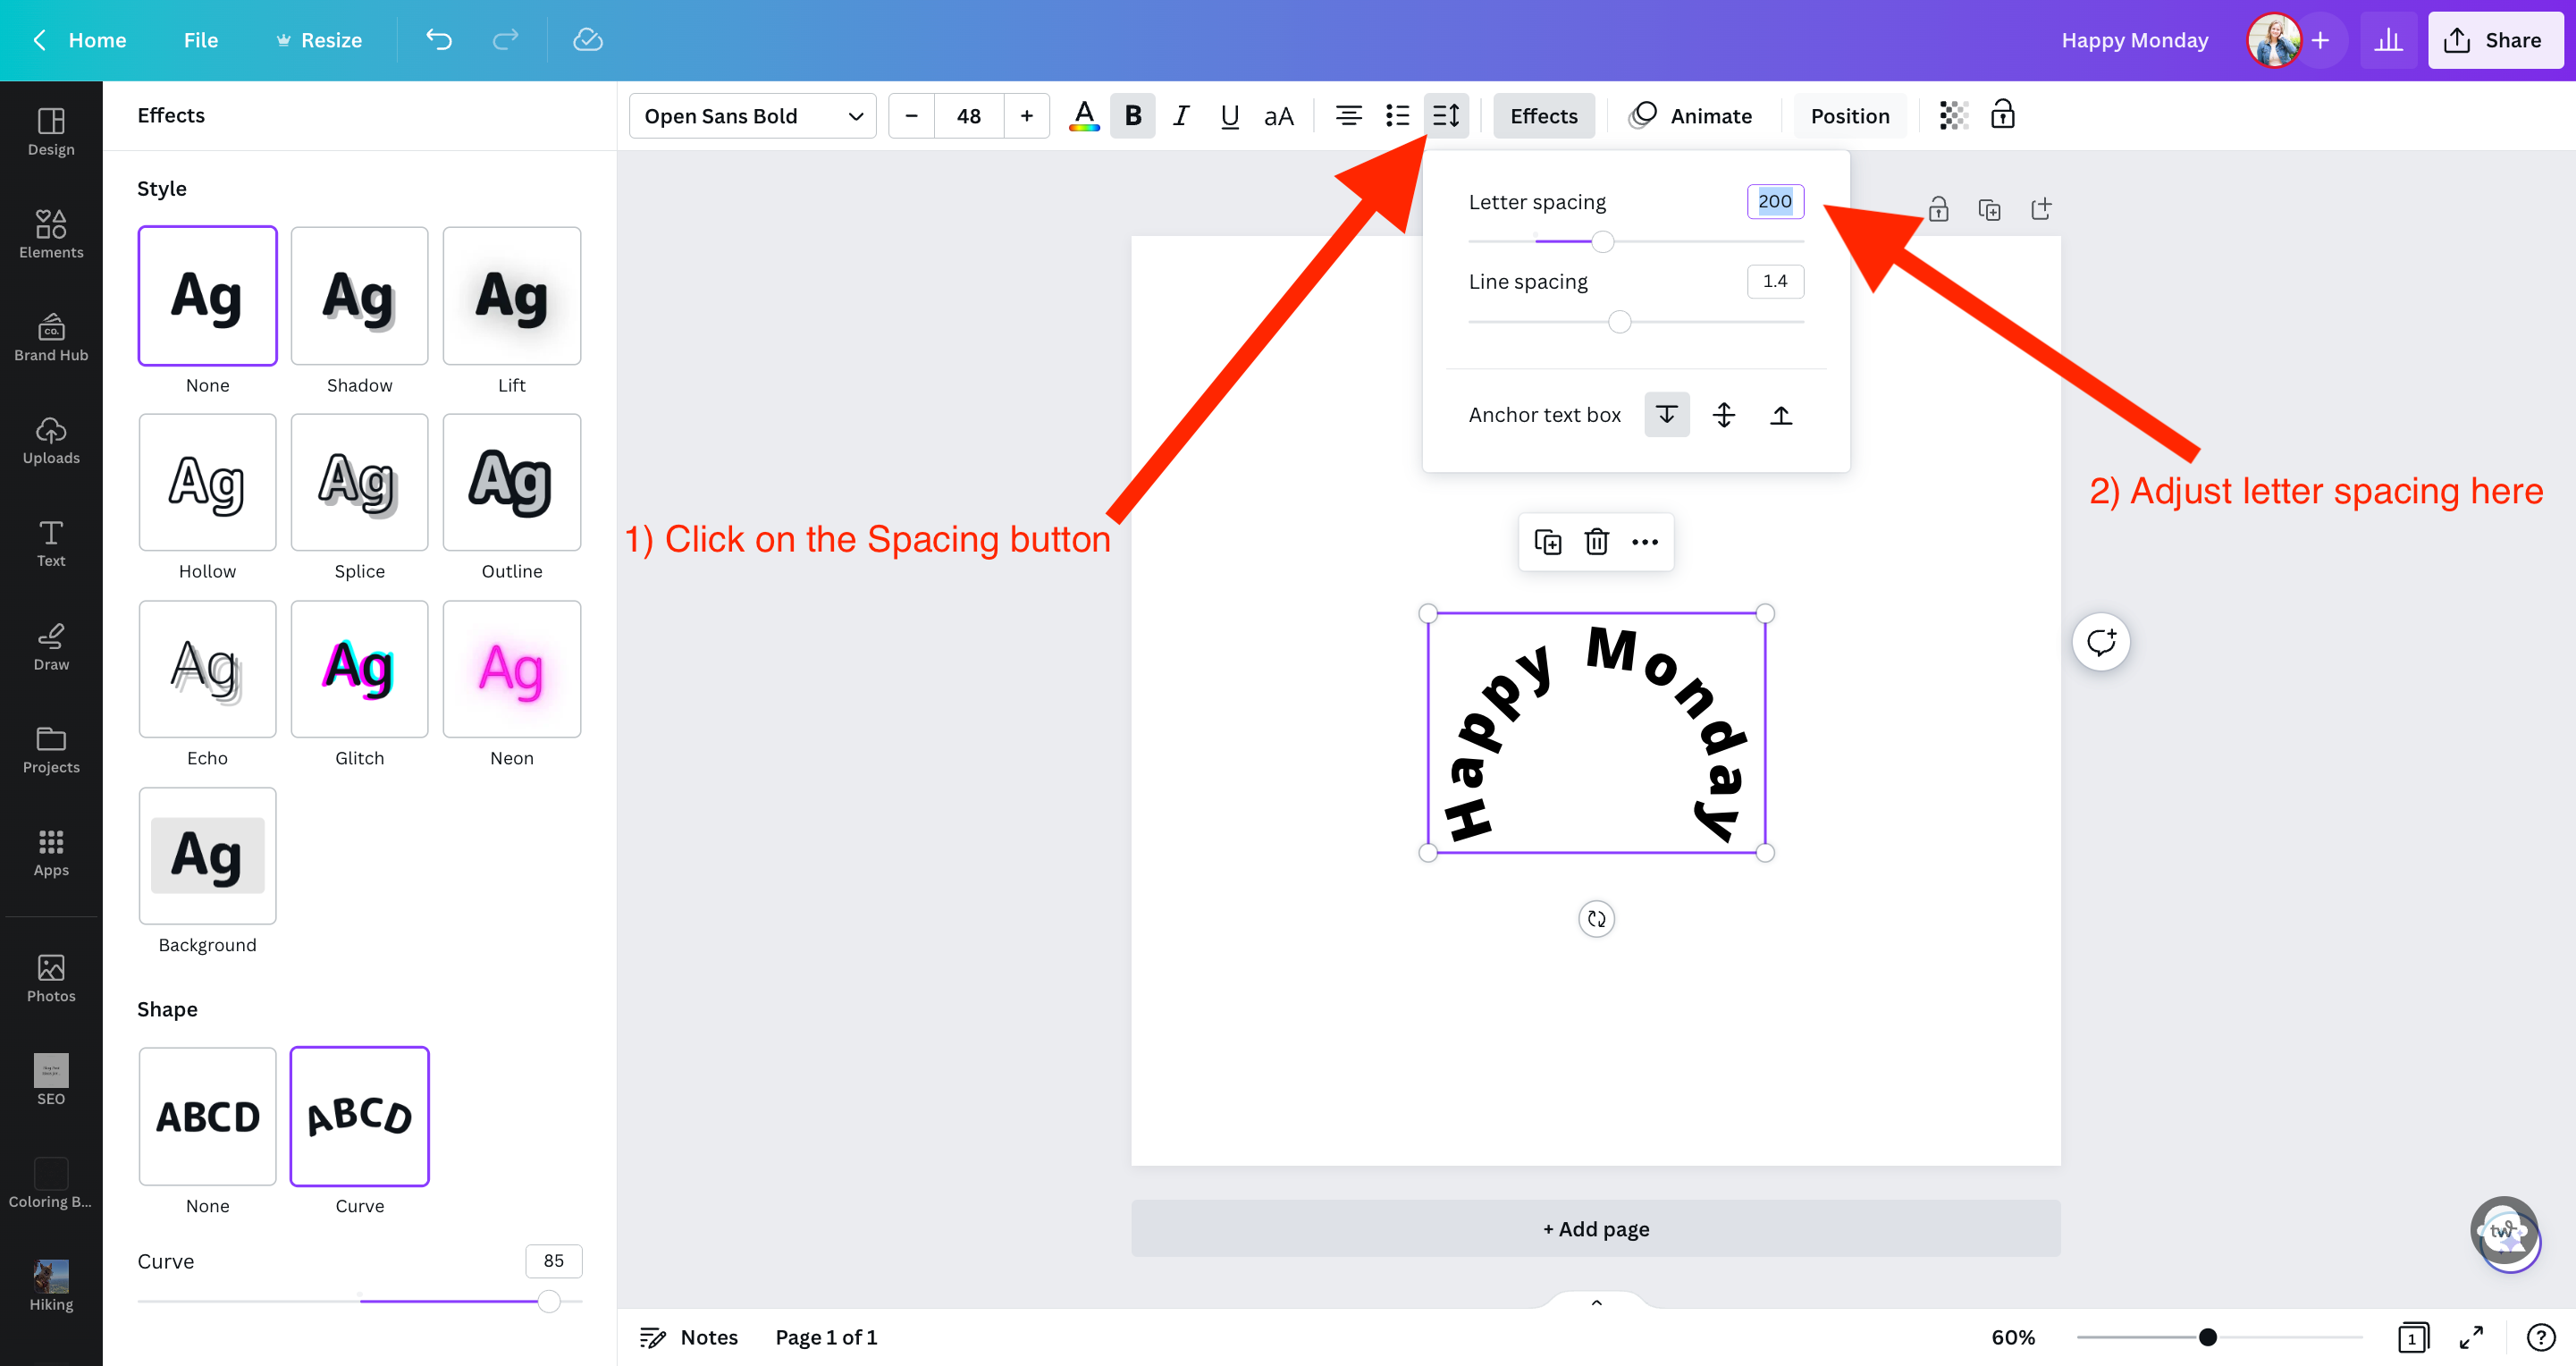
You can also adjust the letter spacing. This is really helpful if you want your circular text to make a complete circle.
Bonus Canva Tip: Search for Templates
Canva is filled with beautiful designs for all kinds of purposes. Many of their designs feature a text curve. You can easily change the words and fonts to meet your design needs.
Final Thoughts
Canva’s curved text generator allows users to add style and elegance to their designs. This tutorial demonstrates how to curve text and enhance logos, text art, data visualization, artistic quotes.
Don’t hesitate. Use curved text to amaze your audience with its organic look. And, please leave comments to show your appreciation, which motivates me to create more tutorials.
For more Canva tutorials, check out these guides: